
How a Single Black Belt Project Jump Starts a Successful Lean Six Sigma Effort – GoLeanSixSigma.com
This is a good case study.
Source: How a Single Black Belt Project Jump Starts a Successful Lean Six Sigma Effort – GoLeanSixSigma.com
This is a good case study.
Source: How a Single Black Belt Project Jump Starts a Successful Lean Six Sigma Effort – GoLeanSixSigma.com
Looking forward to the warm weather after all this COLD.
This is a picture of Rudy going up for the ball.

Mark Rober – Fun.
A silly little project, but demonstrates the ease of building and programming electronics these days.
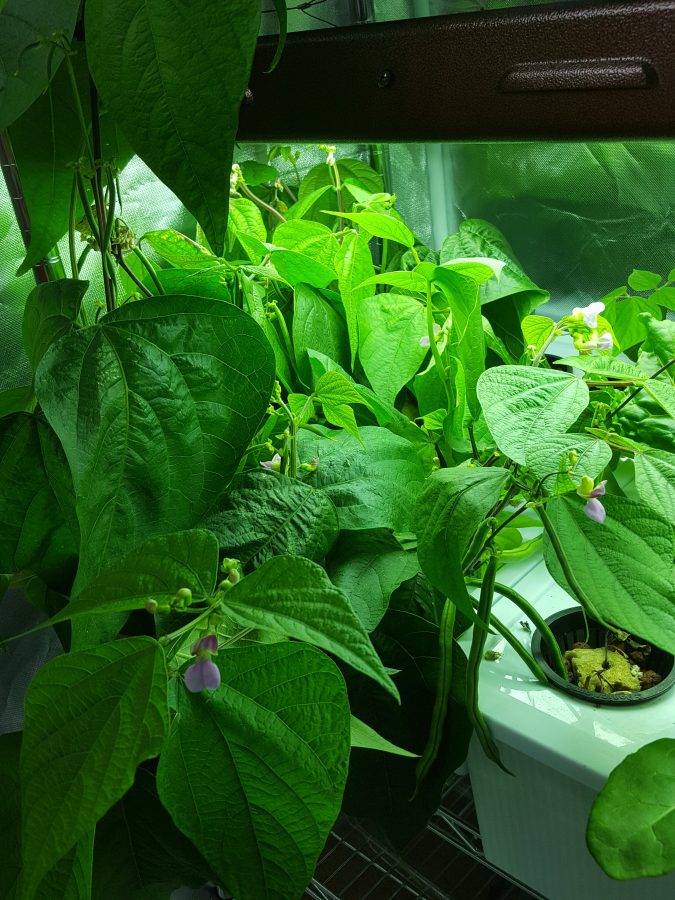
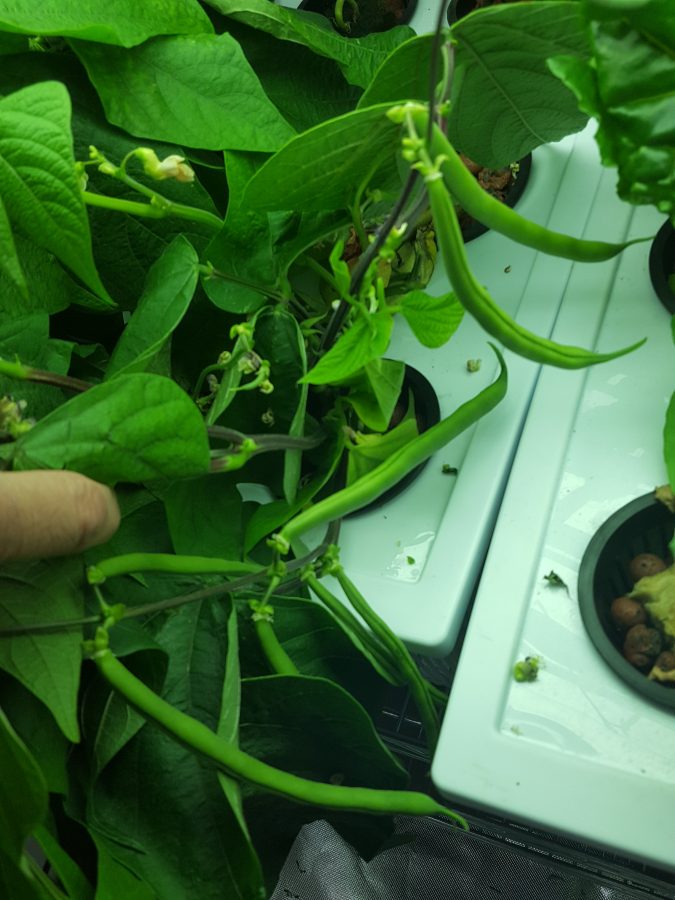
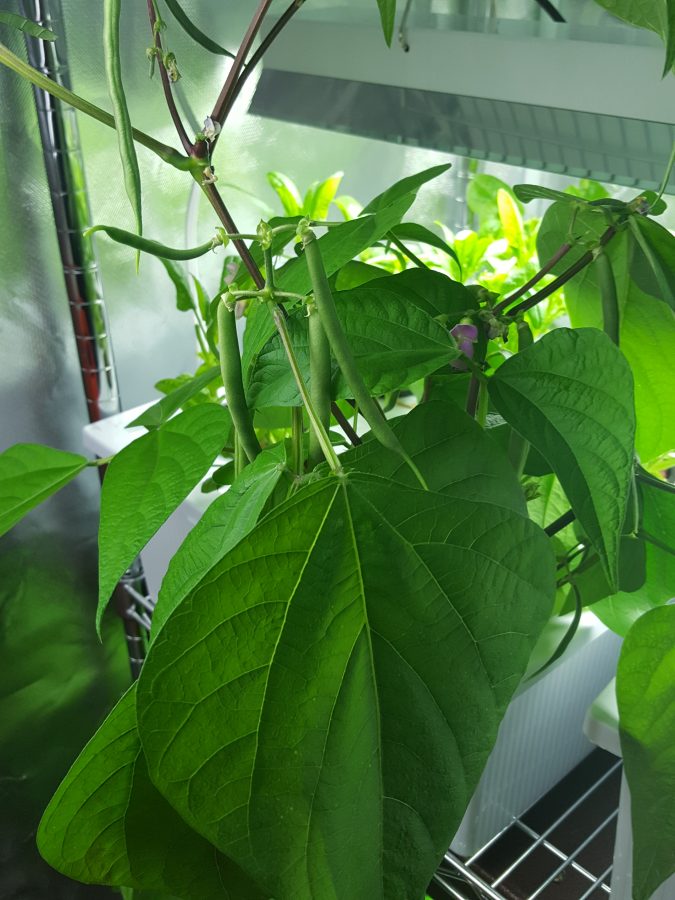
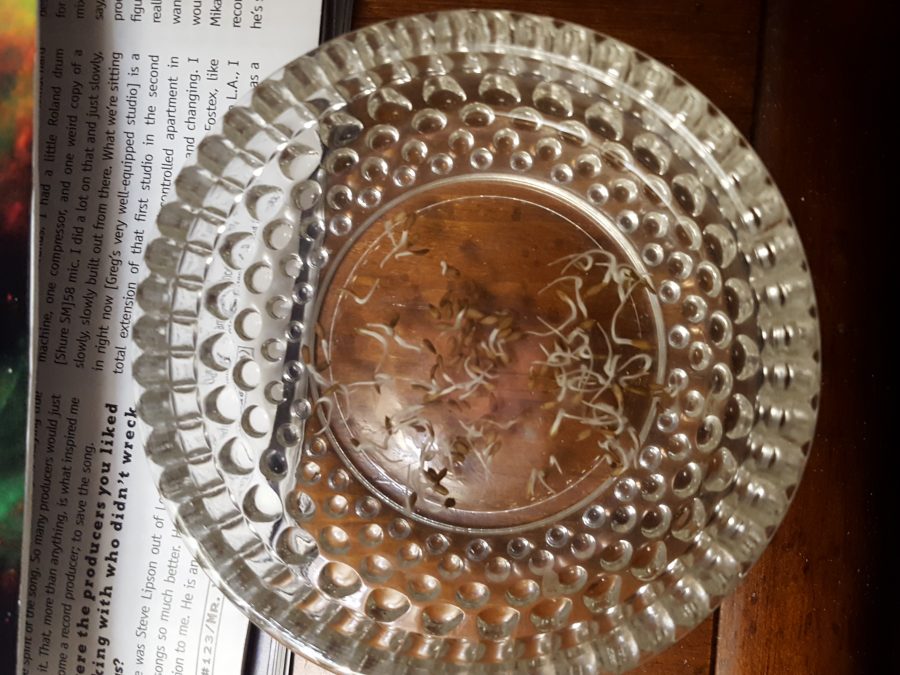
The beans are coming along. Soon I will start the outdoor plants, but for now the indoor ones will do.
Here’s a bunch of the Swiss Chard leaves – they grow pretty fast.


Here’s the beans, the lettuce which I just picked and the chard.

Another shot of the beanies.
On Thursday night in the middle of a National Hockey League game between the Chicago Blackhawks and the Winnipeg Jets, an unfamiliar figure in a No. 90 Blackhawks jersey stepped onto the ice at the United Center.
“Hey, who’s this guy?” an announcer joked.
That guy was Scott Foster, the team’s emergency goalie, a 36-year-old accountant who hadn’t played in a high-stakes hockey game in more than 10 years. He played hockey for Western Michigan University from 2002 to 2005 and plays in an amateur league, albeit a high-level one composed of former college and professional players. His venue most of the time is not the Blackhawks’ United Center, with a capacity of 23,000, but Johnny’s Ice House in Chicago’s elite league.
Submitted by Taps Coogan on the 7th of February 2018 to The Sounding Line.
As part of our ongoing series of historical video-maps we present: ‘The History of China Every Year.’ Running from 1600 BC until 2017 AD, the following video shows the geographic history of the various civilizations and dynasties that have comprised the area now known as China over the last 3,617 years. Far from the stable monolithic image of modern China, the history of China is one of numerous competing states and changing borders, punctuated by occasional periods of stability such as the Yuan and Qing dynasties.
To see other interesting historical maps check out:
The History of the Greeks
Every Year of the Roman Empire
Every Other Day of the Napoleonic Wars
Every Day of World War I
Every Day of World War II
The History of the World Every Year
The Five Largest Cities Throughout History
Every Major Plague Epidemic in History
The Evolution of Modern Government
The Rise of Religions Throughout History
The History of Communism Since 1850
The History of Urbanization
The History of South America
How the World Got Obese
The History of North America
Thursday was International Women’s Day, which sounds like something Austin Powers, the International Man of Mystery, would have thought up. What—just one day? Blacks get an entire history month. This sounds like the beginning of a bad Jewish mother joke that ends: “Never mind, I’ll just settle for one day.” And I have a further confusion: if gender is a social construct, isn’t having a “Women’s Day” problematic? Whatever, the obvious Trumpian response is to have a National Women’s Day. And by the way, today is Chuck Norris’s birthday, so you can already guess who our gun guy for the week is going to be.


Headlines of the week:

What could go wrong?


Oh come on! You can’t be serious.


Oklahoma sushi?


Seems to be this kid should be rewarded.


Here’s a few pictures, note the buried benches!


All of a sudden I started having this problem, not able to connect to my Windows machine downstairs (authentication error).
I did the Disabled = 1 registry hack and I am back!
Source: windows 10 – RDP Crashes After Entering Password – Server Fault
Since the beginning of the year, I’ve been gearing up for indoor growing.
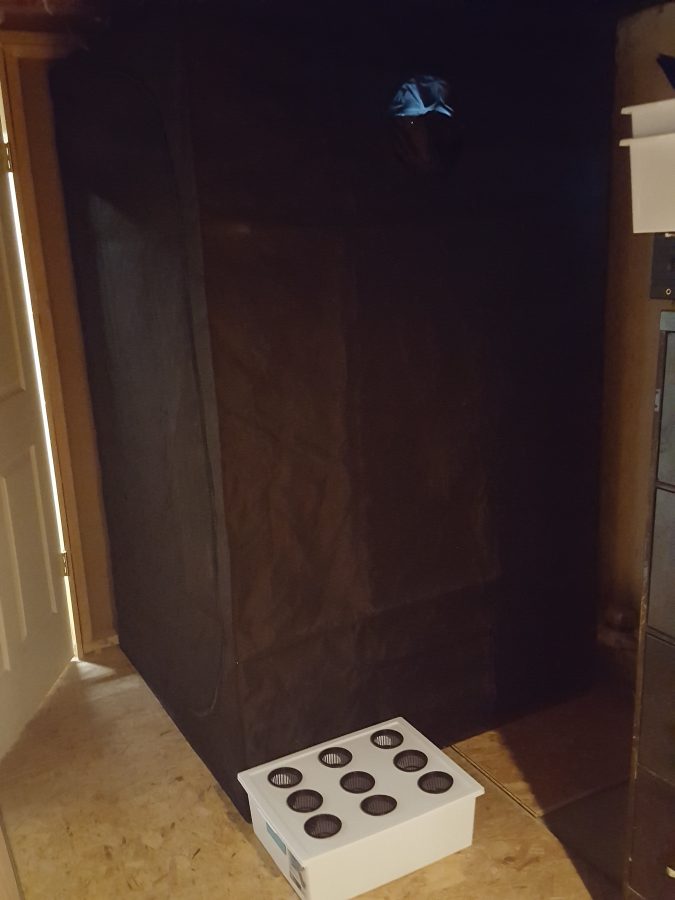
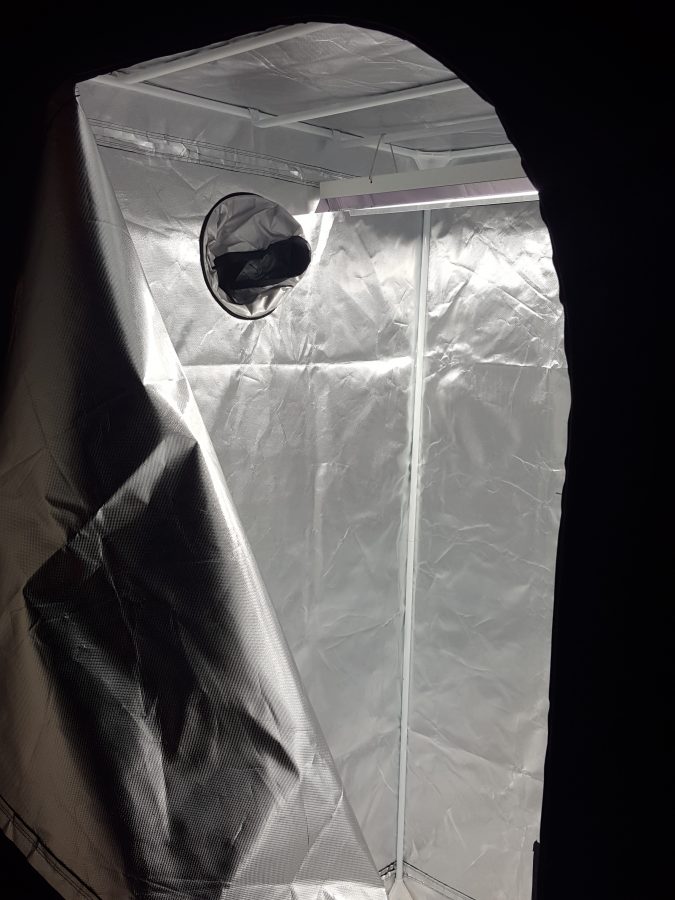
I got a 4 foot by 4 foot growing tent and set it up in the basement. Then I picked up the shelving and some 25 quart bins with covers. I drilled holes in the covers and fit in some 3 inch pods to hold the germinated seeds.
Here are some pictures:
This is the grow tent. You can also see one of the containers that will hold the 9 plants.
Here are some lettuce seeds, germinating in ph corrected distilled water. This is about 3 days in. I got distilled water and some ph adjustment liquids to make sure the PH was between 5.5 and 6.5.
Here’s looking into the grow tent with one T5 4-foot fluorescent light installed
The first shelf I got was 3 foot wide, but you can actually fit 4 foot shelves inside. Here’s a shot of the first tanks. This was taken on Jan 30 2018. I also got a second light for the second shelf.

This is a shot from Feb 14. There are 4 tanks and two grow lights now. The lettuce is doing the best, but the spinach isn’t too far behind.

This is from the 18th of February – some nice lettuce!


Here’s yet another from the Counterpoint sessions in 1979 I think it was.
Here’s another from the tape archives. New Song from Counterpoint in NY – These are basic tracks.
Another of the basic tracks from Counterpoint in NY late 70’s
This is a basic track from New York late 1970s
Source: Old Route 1 Post Card new to the collection – Diner Hotline Weblog
A while back I had a post that featured an image that was an old landmark to me as a small child. The image was of a photo I shot back in the late 1980’s of the Half Dollar Bar sign that was derelict and in danger of being destroyed at that point in time. This was a very big landmark from my youth as it was, as you can probably see from the shape of the left hand side of the sign that this was actually Mister Peanut of Planters Peanut fame. It was for the former Planters Peanut store that was located at this site on U.S. Rte. 1 north in Peabody, Mass.

I use the term landmark because I learned at a very early age what the word meant for a couple of reasons. Probably as a young child, there was a time when during a ride in the car with my family that I or one of my brothers would have asked “where are we”? My Dad might have advised us how to use a landmark to figure out where you are, especially if it was someplace we went all the time. Of course this was during the late 1950’s when Howard Johnson’s advertised as “The Landmark for Hungry Americans”.
So as a young child I was very observant and constantly used landmarks, especially on rides heading north on U.S. Rte. 1 from Saugus, Mass., which was where we entered the fabled roadway coming from Medford, our place of residence. You see Route 1 had many landmarks as it was (and still is) a very busy business strip. That is an underlying reason for when I started actively collecting post cards, I ended up having a fairly large subcollection of Route 1 post cards.
After I started this blog (Diner Hotline has been online since October 31, 2007) I also became a regular visitor on Flickr. I started checking out a lot of Roadside Images that people from all over were shooting and posting. My fellow SCA colleague Debra Jane Seltzer, a regular contributor on Flickr posted a lot of her excellent photos from her travels. During a fairly long roadtrip Debra shot a couple of photos of the Large Mister Peanut sign that was on display at the Planters Peanut plant in Fort Smith, Arkansas.
I left a comment on Debra’s Flickr post that included that photo. I informed her that was in fact the former sign for the Planters Peanut Store that was located on Rte. 1 in Peabody. She responded that maybe it was not the one from Massachusetts as there must have been quite a few spread across the country. I informed her that yes, although there may have been quite a few Mister Peanut signs, (in fact I shot a photo of another one down on Rte. 6 in Southeastern Mass. not too long after I documented the Peabody one), that I recall the story of this one in particular.
Another fellow SCA colleague, Pete Phillips who was a City Planner for Gloucester, Mass. back in the late 1980’s was instrumental in saving the Mister Peanut sign from Peabody. After the Planters Peanut Store closed, it became the aforementioned Half Dollar Bar and the sign was repainted to make Mister Peanut look like a man in a tuxedo. By the late 1980’s the bar was closed and the building torn down, the only thing left was the sign which was also slated to be destroyed.
Pete contacted Planters Peanuts headquarters and informed them of the sign’s predicament. They became interested and decided to have the old Route 1 landmark shipped to their Fort Smith plant and spent some money to refurbish it. It has been on display at the plant ever since. When I was investigating this last year, I actually called the Fort Smith plant and talked with the Executive Assistant to the Plant Manager who confirmed the sign had come from the Boston Area in 1988.
In my previous post about this I ran Debra’s photo of the sign, see below…

To finally get back to the title of this post, since that time I have been periodically searching on ebay for a possible post card of the old Planters Peanut Store on Route 1. I wasn’t sure it existed but seeing as there were post cards of other stores like it from around the country, there was a good possibility that one might have been printed. Sure enough a couple of weeks ago one showed up on ebay and was I so psyched! I bid on it and luckily no one else wanted it. So here it is in all it’s glory. It is certainly proof that the sign in Fort Smith was the one from Peabody!

More Awesomeness:
It’s a good place to go if you have a question and want input from others.
For instance I went there, signed in with my Google account and asked if black holes were spherical. It seems there are other geeks out there, because it was already asked and answered a few times. Give it a try if you haven’t already.
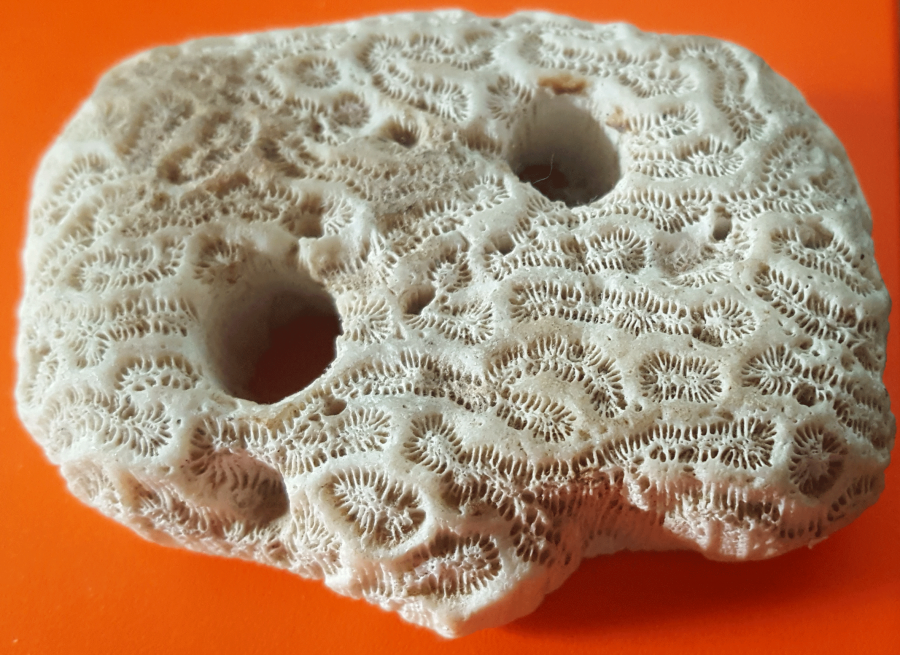
I’ve had this sitting on my desk(s) since 1980. I picked it up while walking along a beach in Montserrat when we were recording our album.
It’s one of the few things I haven’t lost or thrown away 🙂
I guess with the long winter days, this is something that would be fun.
I really like this feature. It automatically creates the videos from my hard drive and puts music to them.
Going to see the master in October!!!
A new song underway – need to finish the drums and come up with an ending, then write lyrics.

Incredible video trip through M42, one on the most magical spots of the Universe that can be seen with a good naked eye…and it happens to be in my favorite constellation.
Source: News | NASA Space Telescopes Provide a 3-D Journey Through the Orion Nebula
Well my son Steve gave his mom something to measure our dog Rudy’s steps. There IS a leader board, so there is some pressure 🙂
He hit number 1 today for the first time, and boy am I tired.

Getting ready to set up my indoor rig. This is a good video with lots of information.
Windows 10: Adding and Keeping custom columns in File Explorer
Every so often I get the crazy urge to clean up my photo, music or video content and when I do I love to see specific columns in File Explorer. For Photos, its Date Taken and maybe even Camera Model. For Music, its Album Size and Protected (to sort between music I’ve purchased or not)
The problem I had was keeping those settings for those folders. I did some searching and found articles and notes on changing the registry etc, but finally found that you just need to make a few simple changes: Setting the Media template and saving the customizations to that media template.
First, Select the parent folder and set it to Music, Pictures, Documents, Video or General (whichever you want to customize)
Let’s stick with Music for this example:
Right click on the parent folder and select Properties ->Customize.
Select the template you want to use.
Make sure to select “Also apply this to all subfolders”
Click OK to exit.

Next, customize the folder view with the columns that you want:
Right client anywhere in the red box area…

Select More if you don’t see the attribute you want to add on the quick list.

For Example – I’ve added Protected and Size.

For music I’ve also sorted by # so all tracks will appear in order.
Once you have that setup the way you want it, go to View on the File Explorer menu and select Options -> Change Folder and Search options:

Under view click Apply to Folders. This will apply the changes you made above to all folders marked as Music.

Repeat customizations for Pictures, Documents or just General folders.
Hope that Helps!
Finally got sick enough of the notification that Edge is faster than Chrome.
Here’s how to turn it off.
https://www.cnet.com/how-to/turn-off-windows-10s-pushy-edge-notifications/
There is a good site that gives lots of detail about this subject.
The site is here: http://www.maxwells-equations.com/index.php#maxwells
It’s clickable to all the symbol explanations.
I wanted to request permission to post this, but I couldn’t find an email address on the website.
Here is a link to the RX Audio Cookbook for spectral audio correction:
https://rxcookbook.izotope.com/
Here’s a copy on the home page as well.
The iZotope RX Audio Cookbook is designed to help you find solutions or ‘recipes’ for solving common audio problems. Each recipe includes step-by-step directions, before and after audio examples, illustrations and tips for solving stubborn problems.
As you work through the Cookbook, be sure to send us your feedback.
A few years back, we had an impromptu celebration when my truck hit 100K miles alongside the highway. Well now we are at 200K and the celebration continues. I know, silly….but fun.
This info comes from Geoff the Grey Geek site.
Decibels are widely used in audio, and often misunderstood. These articles give a practical understanding on using decibels in audio work. But first, some basic questions and answers about decibels.
A decibel is a tenth of a Bel, a unit of level, named after Alexander Graham Bell. A Bel is a very large unit, so the prefix deci (one tenth) is used. A decibel uses a logarithmic scale, not a linear scale like volts or watts – see below.
There is no absolute level called a decibel. A decibel is a ratio. It is relative to something. Unfortunately what it is relative to is often not mentioned when stating a decibel reading. For example, a washing machine might be said to have a loudness of 70dB, this usually means the noise it produces is 70dB higher than the threshold of hearing (0dB).
So why use a decibel? You might have noticed that the volume control on most HiFi amps is marked in decibels, as is the markings on mixer level controls. This is because our range of hearing is so vast, that to use a linear scale we would be using figures from 0 – 1,000,000!
A secret to understanding decibels is to note that decibels are non linear. Another example of a non-linear relationship is between the side of a square and the area of a square.
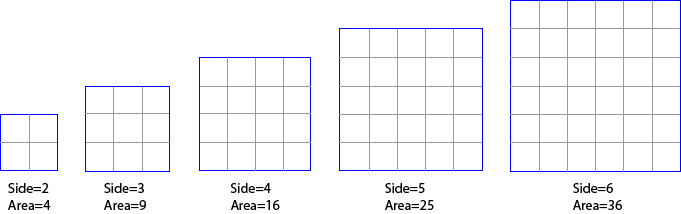 In this example, you can see that increasing the side measurement does not have an equivalent increase in area, but a larger increase. Also a doubling in the side length does not double the area – it is a lot more than the double! This is an example of a non-linear relationship – in this case, a small increase in the side relates to a differnet increase in the area. Decibels are similar. A small change in decibels relates to a different change in the ratio of the two levels being compared.
When we are talking about audio levels we are looking at voltages, or sound wave amplitudes. (Note: power measurements (like the power of an amplifier or speaker) use a different formula). But without getting into formulas etc, we need to accept the following summary of linear ratios and decibels for voltages. (I’m not showing the formulas or calculations because I reckon most people skip over them anyhow, and if you like formulas any search engine will give you as many as you like)

Example One: you increase the volume on a mixer or amplifier by 6dB: this is actually doubling the voltage that will appear at the output (because 6dB is a factor of 2 – see table). So we could say the level is now +6dB, That is, relative to what the level was, it is now 6dB higher. Remember decibels are always relative to something, in this case, to what it was before we doubled (added 6dB to) the level.
Example Two: same scenario, but this time we lower the volume by 6dB. This means we are halving the voltage (because 6dB is a factor of 2). So we could say the output is now -6dB (below what it was before).
These examples also show that it is possible to have positive and negative decibels. If the voltage is +6dB, it is twice the size as it was before. If is it -6dB, then it is half the size it was before.
I know it can be hard, but stay with me here, a few more examples should help.
Let’s say we have a microphone that is giving out 1 millivolt (that is, a thousandth of a volt) when we speak into it. We plug this microphone into a pre-amp (microphone input on a camera or mixer) that has a gain of 60dB. From the table above, we see that 60dB is equal to a linear ratio of 1000. Therefore a pre-amp with a gain of 60dB is going to amplify our 1mV mic level signal by a factor of 1000, giving us a level of 1,000 millivolts or 1 volt. Behold, we now have a signal which is at line level (see article on Audio Levels).
Consequently, we could say that the level of the microphone signal is -60dB compared to the amplified line level. That is, the input is a 1000th of what the output of the pre-amp is.
In practice, most microphones will produce about 10 millivolts (when spoken directly in to), so the signal only needs to be amplified by a factor of 100 to make it up to 1 volt (0.01 x 100 = 1.0). The table above tells us that a factor of 100 is 40dB.
Most mic pre-amps should amplify the signal by at least 40 dB (x100) and some will amplify up to 60dB (x1000). Some video cameras (semi-professional or professional) will have a switch which allows you to switch the gain between 40dB, 50dB or 60dB gain for the preamp. The other way of stating this is to say the input is selected for -40dB, -50dB or -60dB levels. Just remember it is all relative, and the greater the number, the greater the amplification.
Have a look at the manual for your HiFi, mixer or video camera, and find out what level your mic input it expecting. If you are putting more in, it will probably cause distortion.
If for instance you are trying to connect a mixer (PA board) tape out, into your mic input, what do you need to consider? Well, first we need to know what the output level is likely to be. Let’s say that the specifications say the tape out (line out) is -10dBV or 316 millivolts and your mic input is looking for -50dBV (or 3.16 millivolts). This is where decibels makes it easy. We have a level of -10dB, and need to get it to -50dB, easy, use a 40dB attenuator to reduce the level. That is easier than calculating the ratio between 316mV and 3.16mV, (which when you calculate it happens to come to a linear ratio of 100 or a logarithmic ratio of 40dB).
Again, a 40 dB attenuator is indicating a ratio, in this case the ratio between the signal in and the signal out is 40dB, or a factor of 100. That is, the output is one hundredth of the input. If you want to look at other voltage gain or attenuation ratios and decibels, have a play with my Decibel Calculator for Audio
Decibels do make calculations easy, but it can be difficult to comprehend.
In the first article we saw that a decibel is not a fixed unit, rather, it is a ratio between two levels. A decibel reading on its own is meaningless if it isn’t referenced to something. Unless it is spelled out, that reference something is normally 0dB. The mic input on a camera or mixer might say -50dB, that would mean it is 50 dB lower than 0dB. The line out of a mixer or DVD player might be -10dB, meaning it is 10dB lower than 0dB. The stereo out of a mixer might be +4dB, meaning it is 4dB above 0dB.
In simple terms, 0dB is the reference level. It is the level that is being referred to. When the measured level is neither above or below the reference level, then the difference in level is obviously zero, hence our reference level is called 0dB. So what is this level? In most situations with audio, 0dB will refer to Line Level. That is, the nominal level that comes from a mixer, keyboard, camera, or DVD player etc.
This is the $64,000 question, because there are various levels that are referred to as line level. A good specification table for a camera, amplifier, mixer or recorder will always say what voltage level they are using as 0dB. There are several conventional line levels that can normally be used if no other information is stated. The secret is to pay close attention to the letter after dB.
Don’t get too bogged down in all this, just make sure you compare apples with apples. That is, if you are looking at two cameras or recorders or mixers and comparing the microphone input sensitivity, make sure both specifications are dBV, or both are dBu or dBm. Before we look at some real world examples, we need to appreciate that 1 volt is a high level for line levels, and not commonly seen in consumer electronics. The “standard” line level in consumer electronics is normally -10dBV, which is 316 millivolts or 0.316 volts. That is why the tape out of a mixer is often -10dBV. The same level is used for line in on digital recorders, TVs, VCRs and cameras with line in.
The popular Panasonic GS500 (similar to most cameras) states that the audio output level (line) is -10dBV (316mV). This is good because this matches the standard consumer line level found in VCRs and TVs. So when we plug the line out from the camera into the line in of a recorder or TV, the levels match and all sounds good.

The specifications also say “Mic input: mic sensitivity -50dB (0dB=1volt)”. Knowing the reference is 1 volt, and that 50dB is a ratio of 316 (see table) we can calculate the mic input is expecting 3.16 millivolts (1 divided by 316). This is about the level from a normal microphone so all will be good when a microphone is plugged in.
When a sensitive or high output microphone (eg Rode Videomic) is used, it is useful to reduce the output on the microphone so as not to overload the camera input. Hence most users switch in the 10dB attenuator on the Rode Videomic.
A common mixer used in churches and schools is the Yamaha MG series. Its specifications are also representative of many mixers. A quick glance at the specifications reveal both dBu and dBV are used. However at the bottom of the page, they do conveniently state that 0dBu=0.775 volts and 0dBV=1 volt. They also helpfully give the equivalent voltages alongside each dB value. Let’s look at some of the specifications that will interest us if we want to connect to a mixer output.

The stereo out has a nominal output of +4dBu (1.23volts) with maximum +24dBu (12.3volts). It should be obvious that we shouldn’t connect this straight into the mic in on our camera! If we need to connect to this output, we would need to reduce the level by at least 50dB.
The better output might be the tape out. The specifications state “Record out: -10dBV (0.316 volts)”. This is closer to -50dBV (3.16mV) but still 40dB higher than nominal level for the mic input . So we need to reduce even this output by 40dB, or by a factor or 100. The other common output often used from a mixer is the headphone output. Some calculations reveal this can have a level between -9dBV to +4.77dBV, depending on the signal level and headphone volume control. This should be used only as a very last resort, and then still using at least a 40dB attenuator.
Having a range of attenuators, or a variable attenuator is useful. However a 40dB attenuator will assist in most situations. So what is a 40dB attenuator, and how do you make one? Simply put, a 40dB attenuator reduces (attenuates), or divides the signal by a factor of 100. Most music shops will sell what is often called a DI box. The DI stands for Direct Input, or Direct Injection. Either way, it is simply a box which allows instruments (like keyboards and guitars) to be directly plugged into the microphone input of a mixer. These DI boxes also change the signal to a balanced line to be able to run a longer microphone lead (more on this in a coming article). Many DI boxes have a switch which will enable you to select -40dB, -20dB or 0dB attenuation.
If you need to buy a DI box, here is a link to some of Amazon’s range of DI Boxes.
If you are trying to connect from a mixer (line out) to a video camera or laptop with only a Microphone input socket, then it is easy enough to build a simple 40dB attenuator with two resistors, (a 10K and 100 ohm resistor) and a capacitor. The circuit looks like this: 
This circuit simply divides the input which makes the output 1/101th of the input. It can be made up by anyone who knows a little about electronics and can solder. Similar circuits appear in any number of forums with slight variations. They should all work. The capacitor is used to block any DC voltage coming from the camera or from the mixer, it is not always needed.
Here is a drawing of how you might use this as an attenuator  built into a 6.35mm (1/4?) plug (this plugs into the mixer – you’ll need a 3.5mm (1/8?) plug for the mic input). Don’t forget to fit the plug cover on the cable before soldering the resistors and plug on. This doesn’t use the capacitor, but you could fit it in the plug at the other end of the cable if required.
If you want make an attenuator with a different attenuation, use can use my simple decibel calculator for audio.
I hope this has helped in understanding levels and decibels, and the why and how of connecting line level to microphone inputs.
This is a really interesting video. The part I am posting about starts about 3 minutes in. Video is from 2004.
Max Born was a physicist in the early 1900s. He was involved with defining quantum mechanics and the wave function. Go read about him on Wikipedia.
Here’s a link to the defunct vega site that this came from: http://www.vega.org.uk/video/programme/92

This is cool…notice the way that part of the headlamp dims when the other car approaches.


Here’s another pair of Private Lightning songs I found on an old cassette.


I’ve set up my old cassette deck and I am finding some old songs that have passed the test of time and basement box!

Funny story – I am transferring a bunch of old cassettes ( ! ) to my computer, and I came across this tape of my old friend Dave’s band. On the flip side was a recording from WERS radio (Emerson College) with a bunch of circa 1983 songs.
There was this song called Pussy Whipped, and it sounded vaguely familiar. I typed in the main phrase, and came up with this video. Pretty funny.
Recursive chmod all *.sh files within the current directory


It is good to see that Planters was in favor of salvaging a piece of their history in this case the Mister Peanut sign. Too many other companies sadly do not take as much pride.
I love that sign and remember seeing it in its derelict form back in the 80s. It’s kind of near the Hilltop Steakhouse, isn’t it?
Gunnar, not quite. The Hilltop Steak House is on the southbound side of Rte. 1 in Saugus. This sign was on the northbound side in Peabody, just about a mile or so south of the Danvers line. I would say a good 5 or 6 miles apart.
Larry –
Thanks so much for this! I so want to BE IN THAT STORE! Like others, I remember this sign only in its most decrepit form…. Somewhere I have a photo that is much like yours.
And boy, but it’s so nice to know other people who would get excited about a particular postcard on eBay. I know EXACTLY what that feels like.
Keep up the great work!
Ron
Ron, Great to talk with you yesterday! I am certainly glad I shot it back in the 80’s. I remember when it looked like the postcard. We never stopped there but I always remember watching for “Mister Peanut” on drives north as a little kid.
Larry, I grew up in Somerville. I am currently working on a book about growing up in Somerville in the late sixties to the seventies/eighties. Do you have or do you know where I can get some old pictures of Somerville back then. I remember the White Tower Restaurant at the corner of Broadway and McGrath Highway
Any help is appreciated
Anthony
The Mr Peanut sign in Fort Smith is 100% the one from Peabody. After the bar closed several people wanted to purchase it, but it was donated to Planters
We had a Planters store with an identical sign near my
home in Raleigh, NC. Have looked for a postcard for years
with no luck.The sign was destroyed by winds one day.
They used to dress a man in a Mr. Peanut suit and he would wave as traffic passed. Had never seen another one before, how many stores did they have?
Hi John, From what I’ve been able to find out, there were at least 2 different signs that Planters used for their stores the sign located in Peabody, Mass. was one version and there was another one that had Mr. Peanut pointing with his cane. I’m not sure how many stores once existed.
lol, I was just wondering what became of the old Mr. Peanut sign I used to always see as a kid and decided to Google him. It’s nice to know he is still kick’n around.
Hi,
I would like to know if anyone still knows of any Planters/ MR. P eanut Signs that are still out there.
Thanks,
Bob
610-779-9577
Hi Bob, I am not sure how many of those signs existed at one time. The Fort Smith one (the one from Peabody, Mass.) is the only one I know to be still in existance. There had been another one down near Seekonk, Mass., but that one is gone now.
Hi,
I would like to know if the Planters Peanut Sign would be available to Purchase.
Thanks Again,
Bob Devlin
As I said, I am not aware of any others still around.
There was one on Route 22 in New Jersey in the ’60s.
On my way from Florida to ohio in the 1970s was a large planter peanut man hat cane big can anyone tell me where it was I am thinking georgia or florida on i75 ?
Thanks so much for this great informative text and the images. I grew up about a half-mile from that sign and me and friends always wondered what became of it.
After closing, store owners moved to my neighborhood in peabody. They brought the old brass trimmed peanut roasting oven with them. The ex owner would get a sack of raw peanuts,cook them, and all the kids in the neighborhood would get some